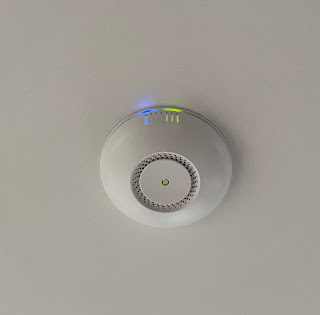
A lot of home WiFi stinks because the WiFi device is poorly placed. The beauty of a ceiling mounted WiFi access point is that it can be positioned optimally for signal excellence. And with excellent signal strength you can get away with many fewer WiFi units, resulting in lower costs, higher speeds, and higher reliability.
I was remodeling my house, and during the work the ceiling near the center of my house became fairly accessible. I figured that a single optimally-positioned WiFi access point might be able provide WiFi to my entire house.
Initial Planning
I chose to buy a MikroTik cAP AC WiFi access point. This is a great little device, and I've had a lot of fun and success with MikroTik, and the price was right.
The MikroTik is powered over Ethernet (PoE), as are most professional-class WiFi access points. This means that the device doesn't need any additional power outlets or cables.
There are many ways to do Power over Ethernet (PoE). The MikroTik cAP AC comes with an Ethernet power injector, but since I have numerous PoE devices I instead elected to use a PoE switch. I bought and installed a low-cost PoE switch in my basement, which I mounted on my networking backboard.
I also needed some decent Ethernet cable. Lousy cable is a poor choice if you're installing it in a wall or ceiling. I was going to buy a 1000 foot spool of wire even though I only needed about 40 feet (or so I thought). But I eventually convinced myself to avoid over-buying and instead purchases 100 feet of quality Cat 6 cable. After all, ~ 950 feet of extra cable sitting in my basement for years on end is a complete waste of cable for everyone.
Rough Positioning
My first step was to figure out exactly where the WiFi access point (AP) should be placed on the ceiling. My house is not a simple rectangle and does not have a simple geometric center, and so placing the AP in the exact center took some thought. Considering the building's shape, the rooms, the outdoor deck and the patio, I concluded that the best position for the WiFi AP would be on the northern side of my dining room ceiling. I drilled a 1/2 inch hole in the ceiling, exactly where I wanted the WiFi access point to go.
Installing the Ethernet Wire
My next step was to drag a wire to that location.
Using a fish tape, I pushed a cotton string into the ceiling, above the drywall. Then, by sticking a coat hanger wire up the ceiling hole, I caught the string and pulled it out the hole. Then I attached the Cat6 cable to the far end of the string and pulled it down through the ceiling hole. After the cable was drawn through, I terminated the cable using a RJ45 plug, conforming to my building's Ethernet wiring standard.
I routed the other end of the Ethernet cable down the wall and into the basement and over to my PoE switch. In all, I used about 60 feet of my 100 foot cable, which was about 50% more than I originally calculated. The lesson learned here is that it is smart to assume that your estimation skills are imperfect. In any case, I still have 40 feet of nice Cat6 cable left over for future uses.
Installing the Access Point
At that point I screwed the mounting plate to the ceiling with a couple of screws and twisted the cAP AC into place. From there, the lights started to glow and I was up and running.
Outcome
Performance and reliability is great. I was originally envisioning the possibility of installing additional access points: one to cover the basement, and another to cover the top floor. Given that the single well-placed access point easily covers my entire property, those plans have been cancelled. I might change my mind if some future tech requires it.
The AP is pretty. Everyone loves the fact there all the network gear and cabling is now out of sight. I can turn off the AP's LED so it never glows or blinks (unlike what's shown in my photo).
Installation Efficiency Tips
I waited for a major remodeling effort to install this ceiling access point. In hindsight, that was unnecessary.
I learned that this kind of wiring project need not wait for a remodeling job. If you're merely in the need of interior painting, that's a great time to put in a cable. That's because cutting holes in drywall to fish cables, and then repairing the drywall is a very small effort. Drywall work is very affordable, and it can look perfect after repair.
Cost and Conclusion
The total installation cost was under $90. The expenses included the MikroTik cAP AC Wifi access point, and 100 feet of Cat6 cable, plus some minor odds and ends. Importantly, the Cat6 cable is in now a part of the building and will be useful for decades to come.
If you are willing and able to install Ethernet cabling, installing a ceiling-mounted WiFi access point is a decisive win.
