
568A versus 568B - Which to use? A guide to making the right choice.

I manage the Ethernet networks in several buildings.  One of the big questions out there is "Which Ethernet wiring standard: 568A or 568B, is the right one to use?"

It is important to note that 568A and 568B are electrically identical.  A router or switch or other device won't be able to determine if a building's cabling is A or B.  The only difference between them is the colors of the wires used at each pin.  And Ethernet devices can't see colors.
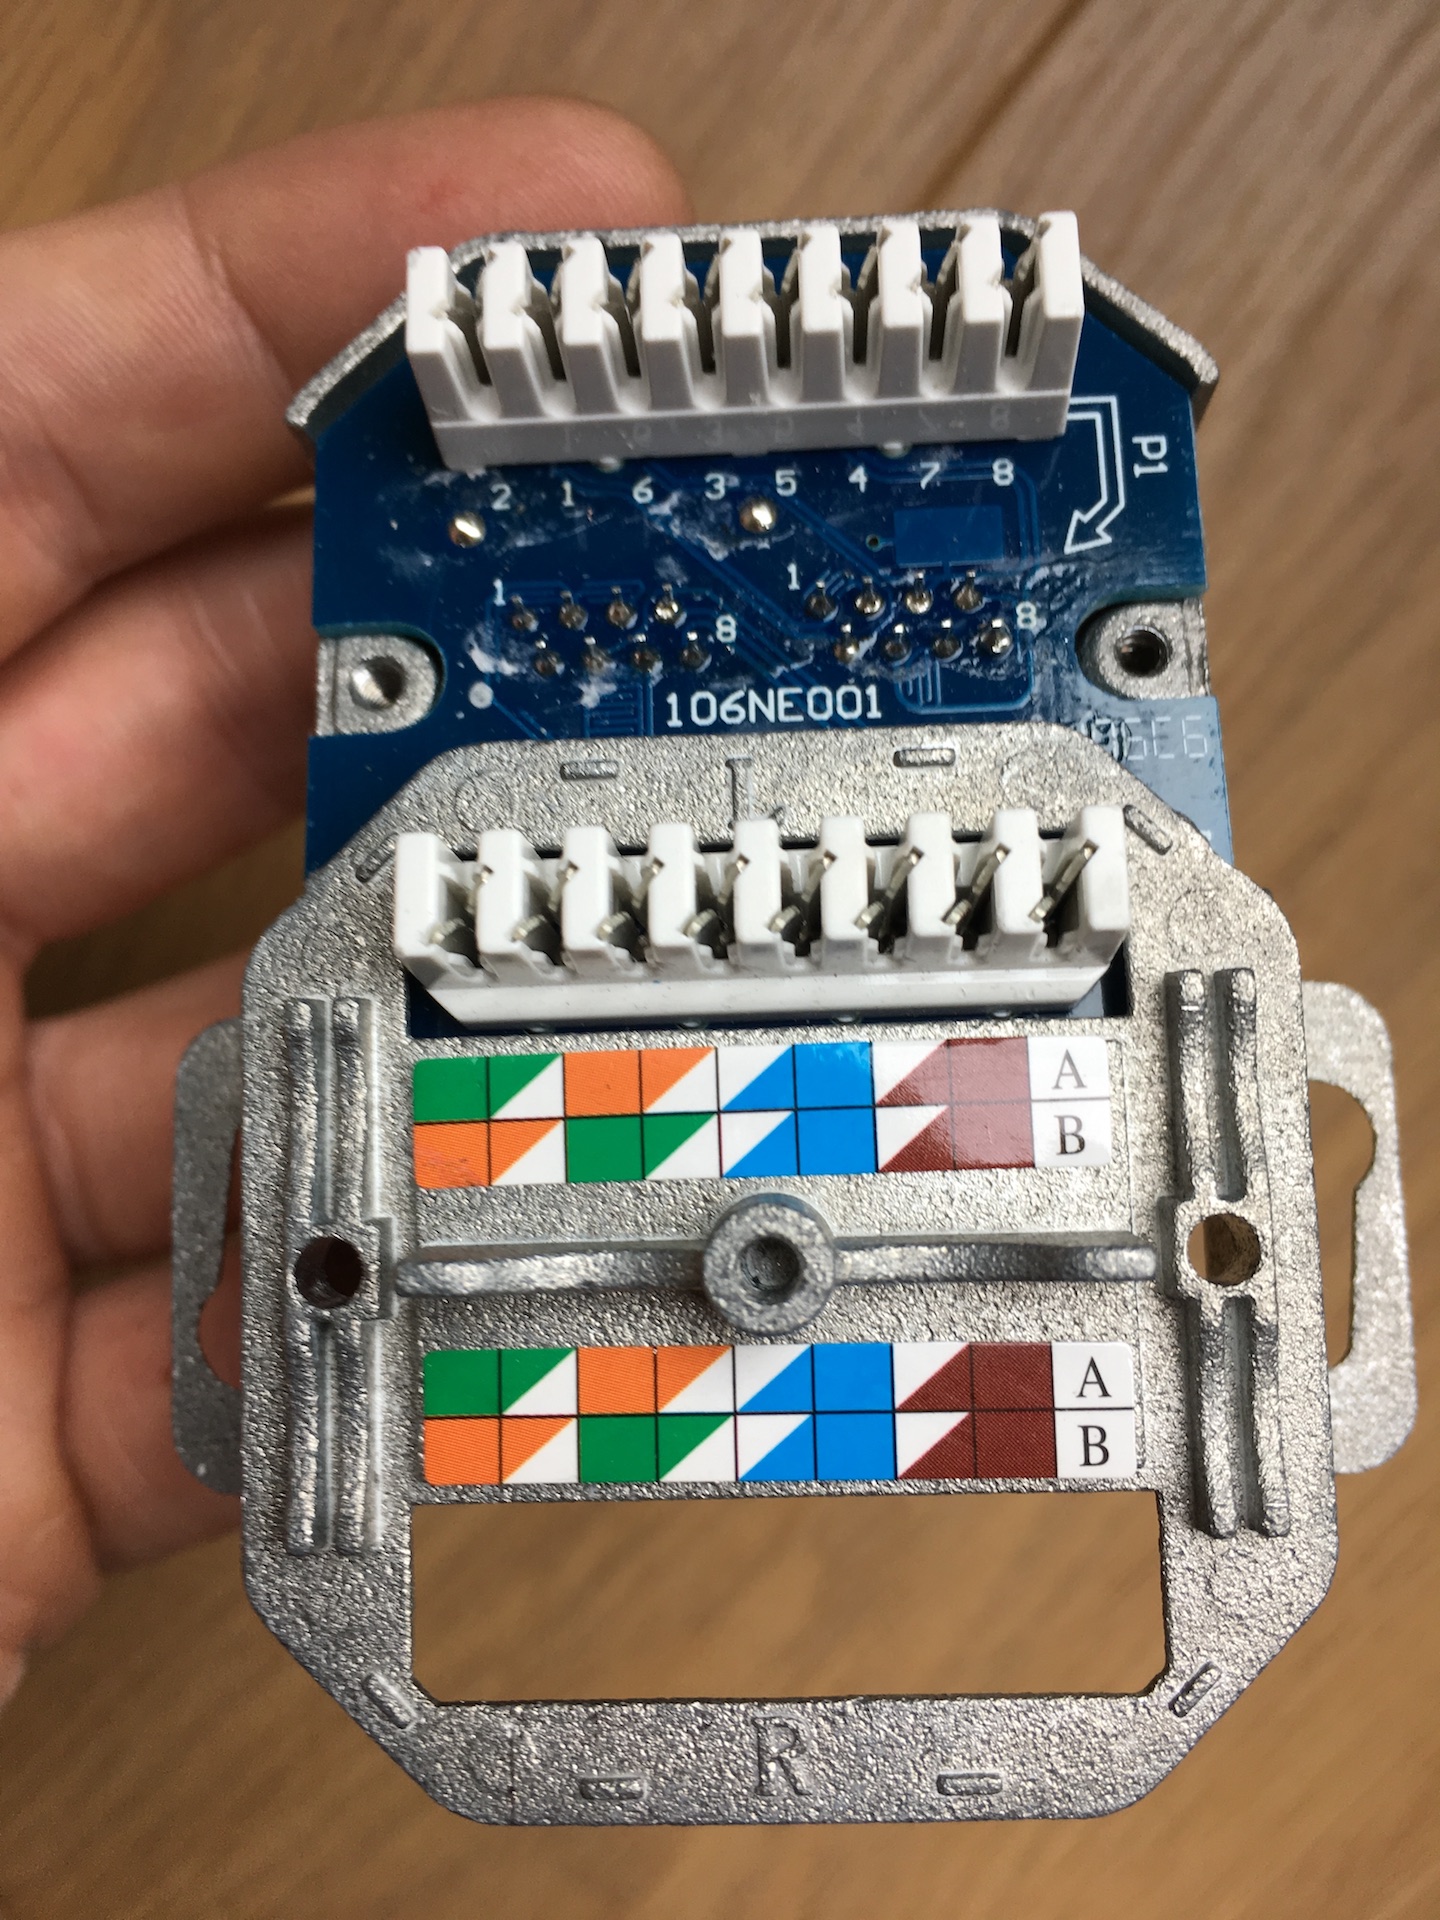
 

568 Color Scheme on Connector
How important is swapping Green and Orange?
 

It is also important to note that the standard used is only important in terms of installed building wiring.  It really doesn't matter for patch cords, where a single person can look at the pin-out colors at both ends without digging into wall boxes or crawling through closets.

But if a specific cable inconsistently uses different wires at each end, that's a problem.  So what matters is consistency.  If you're consistent, all is good.  The goal is to make it easy for anyone doing working to get it right.

Here are my rules for which one to use:

  1. Does the building already follow one of these standards?  If so, use that standard.  Decision made.
  2. Does the campus / group of buildings already follow one of these standards?  If so, use that standard.  Decision made.
  3. Does the organization that owns or controls the building already follow one of these standards?  If so, use that standard.  Decision made.
  4. Are there no standards and no existing wiring?  Use 568A.  Decision made.

The logic in all this is that you do not want a building where there is a mix of both standards.  If a decision has already been made at the local level, use that local standard.  If a decision has been made at the higher level, use that higher level standard.

This only breaks down if you have a mix of standards in one building. At that point, you'll need to try to figure out which one is best for the techs who will be working in the building now and in the future.  For example, you could say something like "all white and beige jacketed cables are 568A, and all blue cables are 568B".   Or perhaps "all cabling must be 568A, except in the west wing, where all cabling must be 568B".  It's not ideal, but it sure beats "random".

In my world, my organizational standard is 568B.  I'm not sure why, but that was selected back in the day.  Therefore, a new building with no existing wiring will use 568B.  Regardless of our institutional standard, roughly 30% of our buildings are 568A based, and we're not going to change them.

Popular posts from this blog

Canon SD890 Review

My Canon PowerShot SD890IS Review Wahoo! I just received my new Canon PowerShot SD890IS . Here's my review of the new SD890IS. Updated! (20-April-2008)! I like taking good photos. And I hate lugging around big cameras and equipment. And so I concluded that I needed to buy myself an awesome point-n-shoot camera. I often take pictures in difficult conditions, such as a museum where a flash camera is prohibited. Or a concert, where I can't use a flash, the lighting is low, and the people on stage are in motion. Or with the zoom cranked up and focused on a distant subject. Taking good photos in these conditions, with a small lens camera and without a tripod is a challenge at best. In comes the SD890. I was particularly excited about the SD890 because it is pocketable, yet it has awesome specifications: Image stabilization ; a 5x zoom lens, and 10 megapixel resolution. When I bought the camera, I imagined that these features would help me take much better pictures in the...

The Trick to Properly Fixing the Rubber Feet of a MacBook Pro

A black rubber foot of my trusty old MacBook Pro finally broke off, and I didn't like how it made the laptop wobbly.  A fix was needed, and quick! First I bought some replacement feet, the kind that just stick on.   These feet are nice because there is no need open up the machine to fix a broken foot.  They're very inexpensive, and the ones I bought have adhesive tape already applied - just peal and stick.  I bought feet like the ones found here. I have read many complaints about how the adhesive doesn't stick, but I think that's because people don't know the two tricks required to get the new feet to stick properly. New Feet to replace a lost Foot Important Trick 1: Make sure to remove all remnants of the old foot - including the pieces in the hole.   My factory-installed foot was attached both mechanically and with adhesive, but when the old foot sheared off, some pieces of the old foot remained in the hole.  Those plastic bits would h...

Sodastream Carbonator Leakage, Usage, and Weight

SodaStream 60L "Carbonator" CO2 cylinders have a specific weight when empty, plus about 410 or so grams for the CO2 they should have when they're "full".  A little while ago I went to buy a replacement Carbonator from my local hardware store. The dealer pulled a new Carbonator out of the box and sensed it was lighter than usual.  He put the "light" Carbonator in the "empty" pile and sold me a different one.  At that moment I concluded that it would be smart of me to weigh both new and empty SodaStream carbonators.  Here are the results. Weighing a SodaStream Carbonator - for both Science and Consumer Protection.       The dealer told me that sometimes the carbonators leak after they leave the SodaStream filling facility.  That means there could be an opportunity for customers like me to get ripped off! The SodaStream cylinders I buy claim to have a net product weight of 410 grams - and that means that a full Soda Stream Carbonator shou...

Fixing a SodaStream Jet, Repair #2 - Broken Fill Button

My Soda Stream Jet's fill button broke, which means I can not longer carbonate water by pressing the pushbutton. This caused all sorts of grief in my household. Here is how I managed to repair my Jet to give it another 10 years of life (hopefully). First, a look at the button The fill button on the top of the SodaStream is actually a simple lever. Pressing down on the button moves a pin that does the actual work of pressing open the Carbonator's valve. Unfortunately, the axis point is fairly thin and can see a lot of stress. That's where my Soda Stream button cracked. [ I think the usage tip here is "don't over-press the button like a gorilla, it doesn't do anything but put high stress on the button."] Cracked levering point of the button The Pesky Lever Retaining Pin The Fix It was pretty easy for me to replace the button: Take off the back of the Soda Stream and remove the carbonator. Push out the the button lever's steel retaining pin. This takes qu...

Hot (and Cold) Attic Tempertures and Electronic Equipment

An unfinished attic can be an extreme environment for electronic equipment, with conditions that are very unlike what is experienced inside normal living spaces. What's the deal with installing electronic equipment in an unfinished and uninsulated attic?   I wanted to install a standard WiFi router in my attic to function as a Wireless ISP (WISP) gateway. My attic is a fantastic location from a radio signal perspective, but it is an uncomfortable place for both people and electronic gear. Although the attic is well insulated, that insulation is on the floor, designed to keep the living space of my home at moderate temperatures. As a WISP gateway, my WiFi router is best mounted above the insulation and close to the roof, where the only protection from weather extremes is the wood of the roof and a layer of asphalt shingles. Equipment Specifications and Extremes Almost all electronic equipment has a set of specifications regarding operating environment. These specifications state the...

Fixing a SodaStream Jet, part 1: Disassembly Guide

I've had my SodaStream Jet for years, and once in a while something has gone wrong. Disassembly is the first step to repair.  Start with this article to see how to disassemble the SodaStream, and then once you have that down, scroll through my other articles to see how I repaired specfic SodaStream problems. SodaStream Jet Disassembly Guide Tools Required Flat head screwdriver Phillips head screwdriver 1. Remove the Carbonator.  Duh. 2. Remove the black panel lever The front big black tilt lever needs to be removed first. Removing this panel is tricky, but it isn't impossible. Looking up at the bottom of the black panel, there are two tabs, one on the left and one on the right. These tabs fully secure the panel in place. The trick is to use a flat-head screwdriver under the plastic to gently lever the tabs out of the way.  Note in the pictures how I approach these tabs with my screwdriver.  I usually release the left side first, and then I release ...

Other Posts

Show more