
Fujitsu S-Series Repair

Fujitsu S-Series Lifebook Laptop S6110
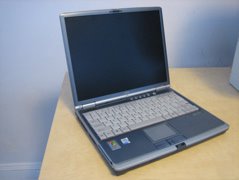
The Patient: Fujitsu S-Series Laptop. The power connector of my S-Series Fujitsu laptop failed (a Lifebook S6110), just like so many others out there. I called up Fujitsu for repair; their local service center wanted about $80 just to look at the laptop (which obviously only needed a new connector). I concluded that it was silly for me to throw $80 at an estimate for repairing the power connector, so instead I went after repairing it myself.  

Researching the problem. 

At first I looked on the web for the right connector. After searching high and low, I found that the Asia Industrial Company appears to sell a very similar part, the DS-208. Let me know if you contact them for this jack. I also saw a part for sale by a laptop power jack "repair" web site, but it didn't look like it would be mountable on my laptop's motherboard - the pins are in a different location, and I think it'd be very difficult to properly mount this part inside of my laptop.  

Going at it.

Some ugly pigtailsPigtails off of the board I decided to start by adding a few pigtails to the motherboard. I opened the laptop, with the helpful instructions found here. Then I soldered in a short length of wire. From there, I added a simple connector on the end of the pigtail. Fujitsu Laptop Repair: Power connector repairedPhase 1 complete, Lifebook operational! At least my laptop is now, um, laptop-able once again. It does look a bit silly with the pigtail, but is is fully functional. I hope to acquire the correct DC Jack for the laptop. Please contact me if you have any leads or advice.

Beyond the Fujitsu

My next step will to try to get that DS-208 part and give it a shot.  It seems like others may be sold as the DC-005.

To be honest, my Fujitsu is getting a little old, so I might end up buying another new laptop. There are a lot good laptops out there... and that's why I didn't initially go for the "Fujitsu service center" repair.

Popular posts from this blog

Fixing a SodaStream Jet, part 1: Disassembly Guide

I've had my SodaStream Jet for years, and once in a while something has gone wrong. Disassembly is the first step to repair.  Start with this article to see how to disassemble the SodaStream, and then once you have that down, scroll through my other articles to see how I repaired specfic SodaStream problems. SodaStream Jet Disassembly Guide Tools Required Flat head screwdriver Phillips head screwdriver 1. Remove the Carbonator.  Duh. 2. Remove the black panel lever The front big black tilt lever needs to be removed first. Removing this panel is tricky, but it isn't impossible. Looking up at the bottom of the black panel, there are two tabs, one on the left and one on the right. These tabs fully secure the panel in place. The trick is to use a flat-head screwdriver under the plastic to gently lever the tabs out of the way.  Note in the pictures how I approach these tabs with my screwdriver.  I usually release the left side first, and then I release ...

Sodastream Carbonator Leakage, Usage, and Weight

SodaStream 60L "Carbonator" CO2 cylinders have a specific weight when empty, plus about 410 or so grams for the CO2 they should have when they're "full".  A little while ago I went to buy a replacement Carbonator from my local hardware store. The dealer pulled a new Carbonator out of the box and sensed it was lighter than usual.  He put the "light" Carbonator in the "empty" pile and sold me a different one.  At that moment I concluded that it would be smart of me to weigh both new and empty SodaStream carbonators.  Here are the results. Weighing a SodaStream Carbonator - for both Science and Consumer Protection.       The dealer told me that sometimes the carbonators leak after they leave the SodaStream filling facility.  That means there could be an opportunity for customers like me to get ripped off! The SodaStream cylinders I buy claim to have a net product weight of 410 grams - and that means that a full Soda Stream Carbonator shou...

Robust Installation of an HDHomeRun Networked TV Tuner. 64 OTA channels!

I added an HDHomerun (HDHR) over-the-air (OTA) streaming box to my home network, bringing over-the-air broadcast TV to my computers, phones and tablets.  The HDHR is a big upgrade from my previous setup: using a simple "window mount" antenna directly connected to my TV. A TV-attached antenna is good for watching some TV for free, but the HDHR offers so much more flexibility. Figure 0: HDHomeRun on my basement wall   My original OTA TV setup was haphazard at best. It was finicky, ugly, and hard for other people at home to use. I would actually tape my antenna to a window whenever I wanted to watch OTA TV. Plus, it only worked on my TV and not with my other devices. I wanted a cleaner and more modern OTA setup. After looking at possibilities, I developed two goals: (1) bring my OTA TV into the modern Internet-connected era, and (2) set it up in a reliable and pretty way so that other family members wouldn't have to fool around with the antenna or anything else.  With that,...

Repairing an HP Pavillion DV6 Motherboard

Here's my procedure on how to remove and replace the logic board of an HP Pavilion DV6. My model is a DV6-3122US, and many DV6s of the 3000 series are similar. These machines often fail to start due to a motherboard failure.  With a motherboard failure, upon pressing power the fan will first spin and the power light comes on.  The capslock key will flash white once every 4 seconds, and the f12 key will stay a solid orange, and the screen - although powered up - displays black only. Although the caps lock "single blink" indicator at boot implies a CPU failure, in my experience it is not due to the CPU itself but the supporting components on the motherboard. The only solid solution is to repair or replace the motherboard.  Replacement boards are readily available.  I bought one and replaced it myself. Disassembly Procedure NOTE: The screws are different sizes, and its important to reinstall them correctly.  I color-coded the different screws in the photos...

Various ways of powering the MikroTik hAP

I have several MikroTik RB952Ui hAP AC Lite routers.  They're located in closets, basements, attics, and on desktops.  Each location results in different needs in terms of power.  Happily, the hAP AC Lite is quite flexible when it comes to power.  Here I document the three different ways I have powered my MikroTik AC Lite routers. Power Solutions: Active PoE+ Splitter, Passive PoE Injector, and Standard wall adapter Standard Power: MikroTik (or aftermarket) Wall Wart The default way to power the AC Lite is by using its standard "barrel-style" power port, which is far more flexible than your typical router.  The AC Lite accepts power between 10 and 24VDC.  When using the MikroTik in a desktop configuration, I use the stock 24 volt MikroTik power adapter .  The stock adapter output specifications are as follows: 24 VDC 1200 mA  2.1mm barrel Center Positive  Passive Power-over-Ethernet solution: TP-Link Power Injector Sometimes it is useful to ...

Repairing a MagSafe Charger's Cord

Here is how to repair the cord of Apple MacSafe power adapters. There are three common failure modes of a magsafe wire: The base of the cord becomes frayed where the wire enters the power brick.  This is usually caused by repeatedly wrapping the cord far too tightly around the brick's "ears". The head of the magsafe connector becomes frayed.  This is usually caused by repeatedly removing the magsafe magnet by yanking on the cord. Chewed up cord.  This is where a pet or other pinching device weakens the cord. These types of failure are usually repairable at home using the technique described here. Tools Required: A beginner's Soldering kit, like this one, including a low-wattage soldering iron, rosin-core Solder, and wire strippers. Heat shrink tubing .   Any color works, but these days I use white to repair a MagSafe cord. One Soldering Sleeve, appropriate for 22 or 24 AWG wire Heat gun (optional.) Process:   The general process is t...

Other Posts

Show more