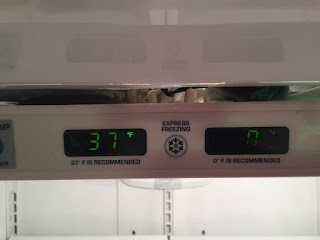
My LG refrigerator's control panel and light dome was melting and started to detach. My fridge looked awful, with melting plastic that started to get in the way of my food. Here is how I easily repaired the control panel in 15 minutes and for under $20. That's far less than a $325 service call!
 |
| A Repaired LG Control Panel |
The Repair
This procedure will work for many LG models even if the control panel itself looks pretty different, as my procedure does not replace the electronic module or its associated control panel label - it only replaces the damaged plastic housing.
Stuff Required
- A good mid-sized Phillips head screwdriver
- A very sharp knife, like a pen knife or box cutter
- The replacement LG control panel trim piece, about $15 on Amazon
- Two 3-Watt LED bulbs that put out much less heat - minimizing a chance for re-occurrence
Repair Instructions
2. Unclip light dome from the control panel. Unscrew the bulbs.
 |
| The Digital Control Panel / Light Dome falling off the ceiling of my LG Fridge |
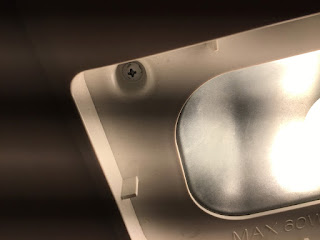
3. Using a Phillips-head screwdriver, remove the two screws holding the roof panel in place (see photo). Note that the panel is still attached to the refrigerator due to wires.
 |
| Two screws hold the control panel to the roof of the LG Fridge |
4. Using the release tab, un-clip the digital panel wire from the control panel. Similarly, un-clip the lightbulb wire from the top of the fridge.
5. Withdraw the entire control/light panel onto a clean work surface like a kitchen counter.
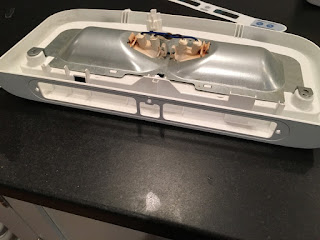
6. Release the metal light bulb housing from the melted plastic panel by releasing the snaps.
7. Snap the metal bulb fixture into the new plastic panel (again, this is the panel housing I bought)
8. Now we remove the label, which is held in place by a light adhesive. Using a thin knife to get underneath, carefully lift and peel off the control panel label from the melted plastic housing. This label will be re-applied to the new housing, so it is best not to damage it or get its adhesive dirty. Carefully set it aside in a clean, dust-free place.
9. Using a phillips head screwdriver, remove the three screws holding the digital control module into old housing. Then unsnap the the digital control assembly from the old housing.
 | |||||
| Ready to remove the electronics from the melted plastic housing |
 |
| Now ready to install the digital control module! |
10. Attach the electronic control assembly into the new housing with the three screws.
11. Re-apply control panel label onto the new housing.
 |
| The Remains: the ugly melted old housing. Yes, it looked this bad! |
12. Re-attach control panel to the top of the fridge by reversing steps 5, 4 and 3.
13. Install new low-wattage LED bulbs, to minimize chance of a future meltdown
 |
| The final result! I only have one LED bulb installed here, but added the second one soon after. |
Conclusion
How did this happen? A combination of things: larger 40 watt light bulbs were installed, and the door was left ajar, allowing the heat to build up to the point of melting. The LEDs never get too hot and should last for decades given their limited use.
That's it! Now my fridge looks perfect, and the control panel is no longer in the way.