My apartment isn't mine, but I pay for the heat... and heat has been getting expensive! So I decided I needed to do something to reduce my heating bills.
Many claim that the easiest way to save money on heat is to install a "set-back" thermostat, but professional installation of a thermostat can be pretty pricey, and even then, the old thermostat was owned by my landlord.
This is how I went on a mission to replace my apartment's thermostat.
After getting my plan together, I asked my landlord if I could replace the thermostat. To my shock, he said "go for it". He's a good guy like that. I'm sure any kind of "management company" would have vetoed my request without any hesitation.
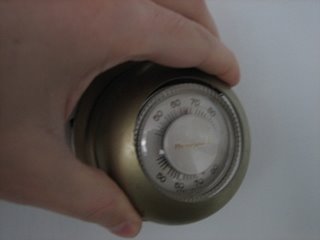
My original thermostat was a basic round Honeywell unit found in about a zillion households. It worked, but it was completely manual. A timer-based thermostat promised to save me lots of money on my heating bills. I went to the local hardware store and purchased a Ritetemp 8030c for about $50. It came with a rebate of $25, so in all it only cost me about $25. Later, I ended up installing a Lux Programmable thermostat, which was very easy to install and was also inexpensive.
Removing the Original Thermostat
The first order of business was to remove the old thermostat. I turned off the power to the furnace and popped off old thermostat's bezel with my fingers. Under the bezel were three small screws that I backed out with a small screwdriver.
With the screws removed, the thermostat easily came off of it's backing plate. The thermostat control wires attach to the plate, and the plate is screwed to the wall. From there, I removed the plate from the wall, leaving the two wires still attached.
After detaching the plate from the wall, I tied a long string to the wire bundle to prevent the wires from slipping into the wall. This is pretty important - it stinks to have your wiring slipped into the wall, because it can be very tricky and complicated to get them back out.
The thermostat control wires were attached to two named screw terminals on the backing plate. One wire was attached to a screw terminal labelled "R", the other wire was attached to terminal "W". I detached the wires using my screwdriver, and labelling them with masking tape. Then I slipped the Ritetemp's backing plate over the wires, in preperation for attaching the wires.
I attached the thermostat wires to the correct terminals of the backing plate. I made sure that the wires were firmly attached to their terminal. Finally, I screwed the Ritetemp's backing plate to the wall, and tested it all out. I set the heat up high and watched the thermostat in action.
Next Time
Some time, I'll let you know how much energy, if anything, I've saved by installing this new thermostat.


