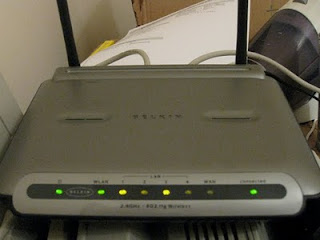
I recently upgraded my Belkin F5D7230-4 v2000 802.11g router with DD-WRT.
For those not familiar with DD-WRT: It's alternative software for a large number of routers. This replacement firmware provides a boatload of features and capabilities that let you maximize your router's potential. After all, the core of a router is a computer.
I didn't have much luck with it with the original Belkin-provided firmware. But with DD-WRT it has been fantastic: fast and stable, with a good range of features.
I was surprised that router is supported by DD-WRT - the v2000 has a limited amount of memory, but sure enough it was on the official support list. With only 2 MB of on-board flash storage, it can't do everything. But with DD-WRT it can do way more than many new, expensive routers.
Limitations of the V2000 with DD-WRT
You should know that there is a limitation with this particular router and DD-WRT. For technical reasons, the old "Cable Modem" port doesn't work. This implies a loss of functionality. But there is a work-around if you can do without wired clients like I can.
And, of course, messing with firmware isn't easy and can damage your router. So proceed with caution!
Steps
This is what I did to install and configure DD-WRT on this router:
At first DD-WRT thinks that your router is a v1444, which has slightly different ethernet hardware. But it isn't - it's a v2000. So to enable the ethernet ports, DD-WRT needs to know that you actually have a v2000.
Enable the ports as WAN
Sadly, the "cable modem" ethernet port of the v2000 remains disabled due to that pesky DD-WRT limitation. What to do? Use the quad ethernet ports for WAN:
 These ports 1-4 operate as switched ports on the
WAN side. Don't use the "cable modem" port.
Now, plugging the cable modem into any of the ports 1..4 results in the router obtaining an address! Yay! It works!
Finally, after getting all this stuff working, I finished configuring the device:
I have to say that my Belkin is much more reliable now - in fact, I have yet to reboot it. Pretty awesome. I do miss having LAN ports available to me - hopefully someone with deeper knowledge of the device will provide the software necessary to control the ports in the way the device's creators intended!
For those not familiar with DD-WRT: It's alternative software for a large number of routers. This replacement firmware provides a boatload of features and capabilities that let you maximize your router's potential. After all, the core of a router is a computer.

I didn't have much luck with it with the original Belkin-provided firmware. But with DD-WRT it has been fantastic: fast and stable, with a good range of features.
I was surprised that router is supported by DD-WRT - the v2000 has a limited amount of memory, but sure enough it was on the official support list. With only 2 MB of on-board flash storage, it can't do everything. But with DD-WRT it can do way more than many new, expensive routers.
Limitations of the V2000 with DD-WRT
You should know that there is a limitation with this particular router and DD-WRT. For technical reasons, the old "Cable Modem" port doesn't work. This implies a loss of functionality. But there is a work-around if you can do without wired clients like I can.
And, of course, messing with firmware isn't easy and can damage your router. So proceed with caution!
Steps
This is what I did to install and configure DD-WRT on this router:
- I downloaded the DD-WRT firmware. I chose the biggest "Bv2000 Micro-Plus_SSH SF" version, as downloadable from here: dd-wrt.v24-13491_Bv2000_micro-plus_ssh.bin
- Next I installed the firmware file using tftp, as described here: DD-WRT install
At first DD-WRT thinks that your router is a v1444, which has slightly different ethernet hardware. But it isn't - it's a v2000. So to enable the ethernet ports, DD-WRT needs to know that you actually have a v2000.
- From my computer, I wirelessly connected to the dd-wrt router SSID
- With my browser, I went to http://192.168.0.1/ and set the username to "root" and the password to a good password.
- From a terminal command line, telnet to 192.168.0.1
- login with the username/password you set above
- Run the following commands:
- nvram set Belkin_ver=2000
- nvram commit
- reboot
Enable the ports as WAN
Sadly, the "cable modem" ethernet port of the v2000 remains disabled due to that pesky DD-WRT limitation. What to do? Use the quad ethernet ports for WAN:
- Go into the web administration interface.
- Choose the "Setup" tab.
- Choose the "Network" tab.
- Set WAN port assignment to "eth0".
 These ports 1-4 operate as switched ports on the
WAN side. Don't use the "cable modem" port.
Now, plugging the cable modem into any of the ports 1..4 results in the router obtaining an address! Yay! It works!
Finally, after getting all this stuff working, I finished configuring the device:
- Set up wireless security on the router
- Configure SSH, DDNS, remote admin, etc.
I have to say that my Belkin is much more reliable now - in fact, I have yet to reboot it. Pretty awesome. I do miss having LAN ports available to me - hopefully someone with deeper knowledge of the device will provide the software necessary to control the ports in the way the device's creators intended!